The new year has finally shown up, why not encourage your family to learn and grow in 2018 with these 6 family DIYs?
In this article, you’ll find out about how to create:
- Terrariums
- Sensory frames
- Owl puppets
- Dragons
- Paint splatter stationary
- Worry warriors
1. Terrariums
For your older children, design your very own terrariums and make them from scratch.

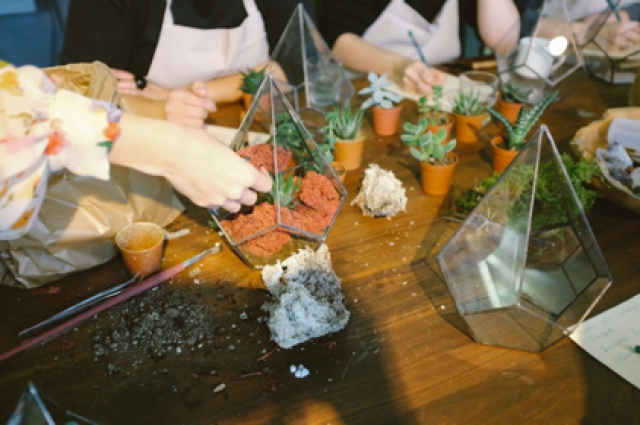
The first step is to take your Polycarbonate sheet and cut it down to the size and shapes you desire. As you can see in the image here, they have cut the sheet into geometric shapes to create an upside-down diamond-like structure.
Leave one side open!
Once you’ve cut your shapes, use sealant or a pre-made frame to form your terrarium. The sealant will stick the sides together. Then, put a hinge on the last, un-stuck panel and the panel you want it to attach it to for an access point.
Next, allow the sealant to dry by holding the terrariums sides together with clamps, making sure not to allow leakage. Finally, you can place your plants and mini figurines in a beautiful display.
2. Sensory frames
A sensory frame is perfect for those of you who have young children, babies or family members with autism, who find sensory play calming. Using their favourite textures and even some new ones, cut each into small shapes.
Secondly, superglue each texture onto separate pieces of cardboard and place them onto a board. Get them involved by allowing them to choose the textures and the order in which they get stuck down onto the board.
By doing this, you’ve created a touch/feel sensory board. But you can also create sensory boards that incorporate each of our senses if you’re up for a longer DIY task.
3. Owl puppet
Instead of buying your children a new soft toy, get them to make a puppet! You can learn how to with this owl puppet step-by-step guide. The only equipment you’ll need is:
- Paper cup
- Circle foam stickers (eyes)
- Coloured card
- Hole punch
- Adhesive
- Scissors (adults should accompany children using scissors)
4. Dragons
This DIY is super simple and uses recycled equipment. All you’ll need is a toilet roll, tissue paper, googly eyes, glue and scissors. Plus, any other decorations you want – GLITTER!

The end result should like something like this fire-breathing dragon from onelittleproject.com.
5. Paint splatter stationary
Our fifth family DIY is one that will get messy, so prepare with newspaper and aprons! Place the newspaper anywhere you think paint could splash, or do this project outside.

Now that you’re prepared for the mess, cut some sticky-back plastic into the appropriate sizes – these will wrap around your notebooks, pencils and pens. Then place them on a tray and allow your kids to go wild splashing and flicking paint over the plain sheets.
Once dried and stuck to your chosen stationary, you’ll own personalised stationary with colourful paint splashed patterns.
For a more detailed guide, visit yourdiyfamily.com.
6. Worry warriors
Our last and simplest DIY needs only paint, paper and any other decorations of your choice – GLITTER! If your kids are only little, cut them a face shape out of card with eye holes (optional).
Allow your kids to decorate the face however they like! The idea is to create a face of a warrior that can tackle their worries. Hence its name, the worry warrior.
Enjoy your time with your family making each of these DIY ideas and let us know how they turned out in the comment section.


